咨询电话:17350880093 咨询电话:17350880093
  手机:17350880093

— 产品中心 —
 全国免费客服电话 17350880093
 邮箱:sales@fyplc.cn
手机:17350880093
电话:17350880093
地址:福建省漳州市龙文区朝阳北路1号办公楼205室

DS3800HSQD1G1F低 HP 序列板设计为每个角上都有一个孔品牌GE加工定制否额定功率要求+5 VDC: 1.0 A (USB满载0.5 A时可达1.5 A)工作温度0至60C(32F至140F)执行速度0.072毫秒每1000布尔指令时钟精度每天最大漂移2秒实时时钟电池预计寿命5年嵌入式串行通信Rs-232 (com1) rs-485 (com2)支持的串行协议Modbus RTU Sl
产品详情
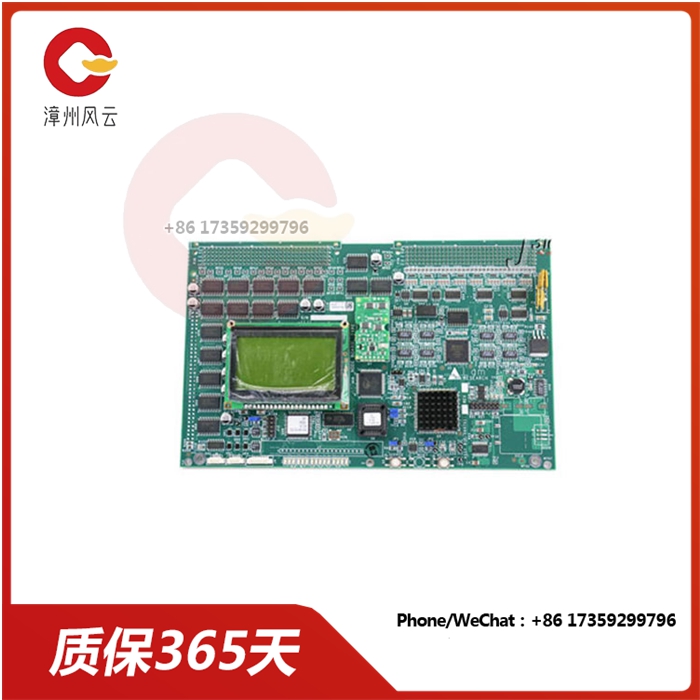
GE 低 HP 序列板DS3800HSQD1G1F设计为每个角上都有一个孔,用于插入螺钉以将板固定在驱动器中。GE 低 HP 序列板DS1HSQD3800G1F还配备了 1 个 2 针连接器和 40 个 1 针连接器,带有固定杆,用于固定带状电缆。该板还装有 20 针连接器和 50 个 1 针连接器。该板还装有 20 个可擦除可编程只读存储器 (EPROM) 模块和 1 个琥珀色指示灯 LED 和 1 个红色指示灯 LED。
当您准备更换 GE 低 HP 序列板DS3800HSQD1G1F时,需要考虑几个事项。更换板在板上带有 EPROM 插座,但插座上未安装模块。这是有意为之,因为它使您能够将模块从旧板移动到新的替换板。
电路板的行为由控制电路板的固件和编程指令决定。要确保更换板的处理方式与旧板相同,请将模块从旧板移动到新的更换板。这是一个快速简便的过程。使用平刀工具(如螺丝刀)将其插入模块和插座之间的插槽中。提起模块的那一端。将螺丝刀放在插座的另一端,然后执行相同的步骤卸下模块。立即将模块滑入防静电袋中。
The GE Low HP sequence board DS3800HSQD1G1F is designed with a hole in each corner for inserting screws to secure the board in the drive. The GE Low HP sequence board DS1HSQD3800G1F also comes with 1 2-pin connector and 40 1-pin connectors with a retainer rod for securing ribbon cables. The board is also equipped with 20-pin connectors and 50 1-pin connectors. The board is also equipped with 20 erasable programmable read-only memory (EPROM) modules and one amber LED and one red LED.
When you are ready to replace the GE low HP sequence board DS3800HSQD1G1F, there are several things to consider. The replacement board has an EPROM socket on the board, but no module is installed on the socket. This is intentional because it enables you to move modules from the old board to the new replacement board.
The behavior of the board is determined by the firmware and programming instructions that control the board. To ensure that the replacement board is handled the same way as the old board, move the module from the old board to the new replacement board. It's a quick and easy process. Use a flat knife tool, such as a screwdriver, to insert it into the slot between the module and the socket. Lift the end of the module. Place the screwdriver on the other end of the socket, then follow the same steps to remove the module. Immediately slide the module into the ESD bag.
相关推荐

服务热线